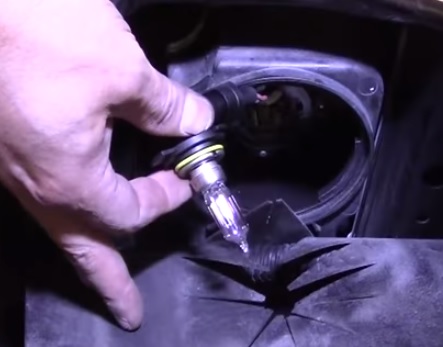
Replacing a headlight bulb on a 2014 GMC Sierra 1500 is a solid DIY job.
The driver side is the easy one. The passenger side is tighter and usually needs the air box pulled for room.
These steps cover the common halogen projector setup on the 2014-2018 Sierra 1500 (K2XX). If your truck has factory LED headlamps, there is no serviceable bulb — the whole lamp assembly is the part.
If you are not sure, stop and take it to a shop.
What Headlight Bulb Does a 2014 GMC Sierra Use?
- Low beam and high beam: 9012 (also called HIR2) — one dual-beam bulb per side
- Fog lights (if equipped): 5202
On these Sierra 1500 trucks, low and high share the same 9012 bulb. A shutter in the projector switches between low and high.
Sierra HD (2500/3500) trucks are different. Many of those use separate H11 low-beam and 9005 high-beam bulbs, so do not mix parts charts.
Always match the year, make, model, and the marking on the old bulb before you buy. Then compare the new bulb to the old one before it goes back in.
Do not touch the glass with bare fingers. Skin oil can leave a hot spot and burn the bulb out early. Use gloves or a clean cloth.
Tools and Parts Needed
- New 9012 headlight bulb (HIR2)
- Screwdriver to remove the air box on the passenger side
No tools are needed for most driver-side swaps. A screwdriver is needed when you have to take the air box out on the passenger side.
How To Replace the Driver Side Headlight Bulb
1. Open the hood and find the bulb behind the headlight assembly on the driver side.
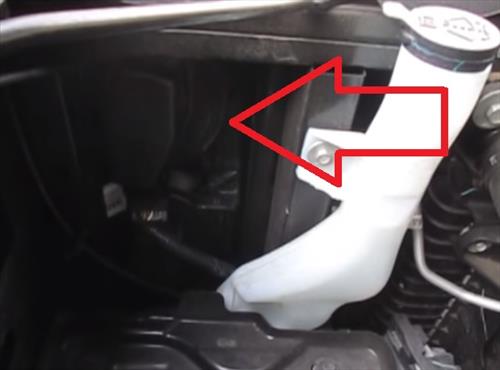
2. Remove the dust cover by turning it counter-clockwise.
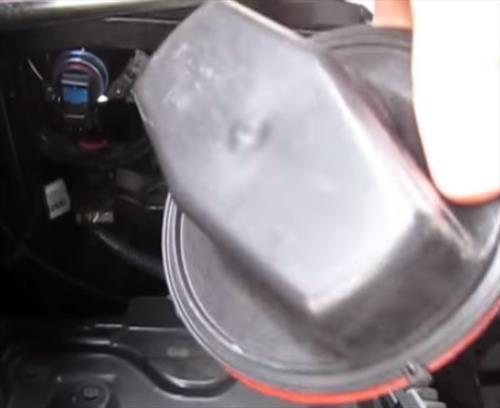
3. Unplug the electrical connector from the back of the bulb.
4. Twist the bulb counter-clockwise and pull it straight out.
5. Install the new 9012 bulb and twist it clockwise to lock. Do not touch the glass.
6. Plug the connector back on, then reinstall the dust cover clockwise.
7. Turn the headlights on and check low and high beam before you close the hood.
How To Replace the Passenger Side Headlight Bulb
The passenger side uses the same bulb and twist-lock steps, but space is tight behind the lamp.
1. Open the hood and look behind the passenger headlight.
2. Remove the air box so you can reach the bulb cover. Take a photo of hose and clamp positions first if you have not done this before.
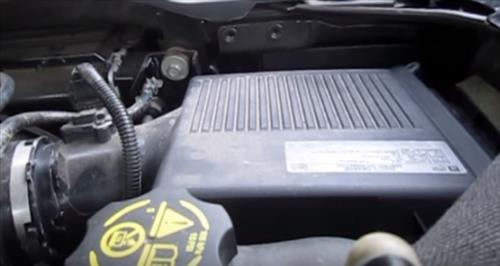
3. Remove the dust cover by turning it counter-clockwise.
4. Unplug the connector, twist the old bulb out, and install the new 9012 the same way as the driver side.
5. Reinstall the cover and air box, then test low and high beam.
Make sure intake clamps and the air-box lid seal are snug when you put the box back. A loose box can whistle or let unfiltered air in.
Tips Before You Close the Hood
Replace bulbs in pairs when you can. If one side is dim or burnt out, the other is often not far behind.
Rust, road salt, and prior body work can make covers and connectors stick. Work them gently so you do not crack the housing.
If the new bulb still does not light, check the connector, the fuse, and ground before you buy another bulb.
Have you already swapped the 9012 on your Sierra, or are you stuck on the passenger-side air box?
Passenger side on that Sierra is a tight squeeze for sure.
The passenger side tip about pulling the air box saved me
Passenger side on these trucks is always a fight to get in
Great instructions and made to be very easy
Hey, nice work. Very helpful. 👍